iPhoto is an excellent Mac OS X application created by Apple which is used by countless amateurs (like yours truly) to manage their digital photo collection. Since the release of iPhoto ’08, a lot of people have wondered how to do an incremental backup of their library as this latest version of iPhoto keeps the library in a package (a special type of folder) instead of a plain folder and some backup applications have trouble with that. (An update: I tried doing the same thing with the latest HFS+-aware version of rsync 3.0 but I couldn’t do it as it seems to me that rsync does not copy all the metadata created by Mac OS X. Maybe I missed an option…)
I’ve managed to do incremental backups (i.e. quick and painless) using my registered version of SuperDuper! It’s important to use a registered version of SuperDuper! in order to do smart updates which is what SuperDuper! calls incremental backups. The non-registered version of SuperDuper! cannot do incremental backups which means that the whole iPhoto library will be copied over when doing a backup (which means 15Gb in my case…)
This great backup software is normally used to backup a whole partition (i.e. my MacBook’s hard disk) to another partition (i.e. a partition on an external drive which can then be used to boot the MacBook.) I’ve just realized that it’s relatively straightforward to restrict the files to be backed up to a selection (i.e. your iPhoto library only…) and, instead of the destination being a partition, to choose a sparse image (i.e. a special file containing other files and which takes up only as much actual disk space as the data contained within.)
Step 1
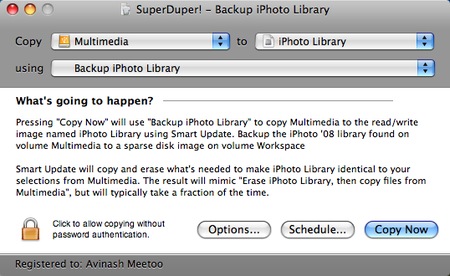
First of all, select the partition where the iPhoto ’08 library resides in ‘Copy’ (mine is Multimedia.) Then select where the sparse image will reside (I chose a folder on another disk.) Then you’ll have to create what SuperDuper! calls a copy script which will be used to indicate what to copy and what to ignore. To do that click on the drop down next to ‘using’ and choose ‘New Copy Script.’
Step 2
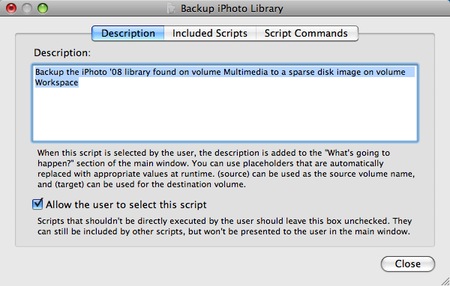
Write a nice description and make sure that the ‘Allow the user to select this script’ is ticked.
Step 3
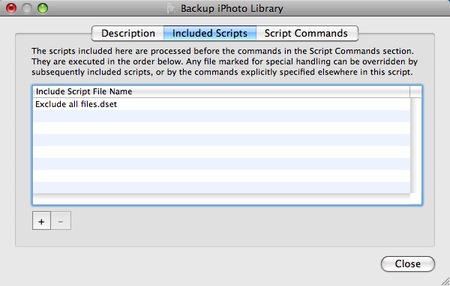
In the ‘Included Scripts’ tab, click on the ‘+’ and choose the predefined ‘Exclude all files’ script. This is to make sure that SuperDuper! only backups those files and folders that you’ll explicitly specify and ignore all the rest. This is essential.
Step 4
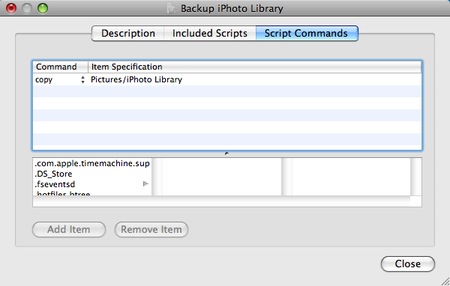
Then, in the ‘Script Commands’ tab, navigate to the folder where the iPhoto library is found and select it. Click on ‘Add Item’ and it will be added in the top part of the window. The default command is ‘ignore.’ Change that to ‘copy.’ As you can easily guess, this, combined with the ‘Exclude all files’ seen previously, will tell SuperDuper! to only consider the iPhoto library and nothing else which is what we want.
Click on ‘Close.’ and give a sensible name to the script (‘Backup iPhoto library’ is nice…)
Then you can click on ‘Copy Now’ and, voilà , an incremental backup is done! Remember to use a registered version of SuperDuper!

